-
By:
- jakayla
- No comment
thread guide in sewing machine
Threading Your Sewing Machine⁚ A Comprehensive Guide
Mastering the art of threading your sewing machine is crucial for successful sewing. This guide provides a step-by-step process, illustrating the path of the thread through the various components, including the spool pin, tension discs, and the needle. Understanding the function of each thread guide ensures smooth operation and prevents common threading issues.
Understanding Thread Guides⁚ Their Role and Importance
Thread guides, those small metal or plastic loops and grooves on your sewing machine, are far more important than they might initially seem. They aren’t just decorative additions; they play a vital role in the smooth and efficient functioning of your machine. Their primary purpose is to direct the upper thread along a precise pathway from the spool to the needle. This controlled path prevents tangles, ensures consistent thread tension, and contributes to the creation of even, high-quality stitches. Without properly functioning thread guides, your thread might snag, break, or become misaligned, leading to skipped stitches, uneven seams, and frustrating sewing experiences. Different sewing machine models may have varying numbers and placements of thread guides, but their fundamental function remains consistent⁚ to guide the thread accurately and prevent any interruptions during sewing. Paying attention to the thread path and ensuring the thread smoothly passes through each guide is paramount for successful sewing projects. A well-threaded machine is a happy machine.
Identifying Thread Guides on Your Specific Machine Model
Locating the thread guides on your sewing machine is the first step towards successful threading. While the general principles remain the same across various models, the exact placement and number of guides can differ significantly. Consult your machine’s instruction manual – this is your most valuable resource for precise guidance. The manual contains detailed diagrams illustrating the thread path and clearly labels each guide. If you lack the manual, many manufacturers provide downloadable versions on their websites. Alternatively, online resources such as video tutorials and sewing blogs often feature guides specific to various machine brands and models. Look closely at the top of your machine; you’ll find guides near the spool pin, often numbered sequentially to guide you through the threading process. These guides typically consist of small metal or plastic loops or grooves designed to hold the thread securely in place as it travels towards the needle. Carefully examine the area around the tension discs and the take-up lever, as these areas also incorporate crucial guides. Understanding your machine’s unique layout is key to mastering the threading process.
The Step-by-Step Threading Process⁚ A Universal Approach
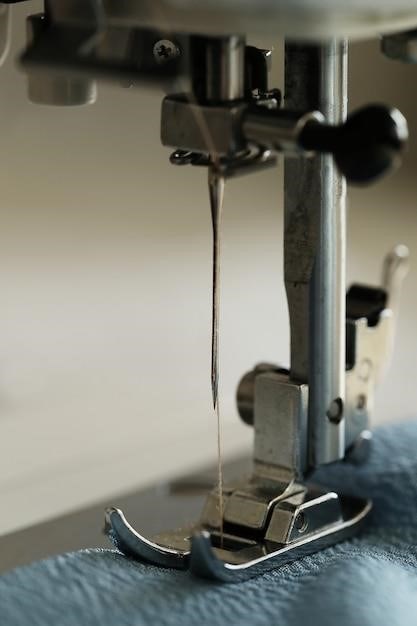
Threading your sewing machine, while seemingly intricate, follows a logical sequence. Begin by raising the presser foot and needle to their highest positions, ensuring unobstructed thread passage. Place the thread spool onto the spool pin, and then carefully guide the thread through the initial thread guide, usually located near the spool pin. Follow the thread path indicated by the guides, often numbered sequentially on the machine’s body. The thread typically travels across the top of the machine, sometimes passing through tension discs that regulate the thread’s tension during sewing. Continue guiding the thread down the front of the machine, often through a vertical groove acting as a guide. Next, thread the take-up lever, a crucial component controlling the upper thread’s movement. This is usually a small hook or loop near the top of the machine. Finally, thread the needle from front to back, ensuring the thread passes through the eye smoothly. Gently pull the thread, checking for smooth movement through all guides. With practice, this process becomes intuitive, allowing for seamless sewing. Remember that a correctly threaded machine is vital for consistent stitch quality.

Troubleshooting Common Threading Issues
Encountering tangled thread or skipped stitches? This section addresses common threading problems, offering solutions for preventing and resolving these issues. Proper thread guide usage and tension adjustment are key to successful sewing.
Dealing with Tangled Thread⁚ Prevention and Solutions
Tangled thread is a common sewing frustration, often stemming from improper threading or neglecting the thread guides. Prevention begins with careful attention to the thread path. Ensure the thread smoothly passes through each guide, avoiding forcing it. Regularly inspect the guides for any obstructions – lint, dust, or broken pieces can easily cause tangles. Before starting a project, take a moment to clear away any debris. When threading, maintain a gentle, consistent tension; pulling too hard can cause the thread to snag or twist.
If a tangle occurs, don’t panic! Begin by carefully unwinding the thread from the needle and bobbin area. If the tangle is severe, you may need to remove the bobbin case and carefully untangle the thread within. Once the tangle is resolved, re-thread your machine precisely, paying close attention to the path of the thread through each guide. A little patience and methodical approach will quickly get you back to sewing. Remember, prevention is key. Regular cleaning and careful threading practices will minimize the occurrence of frustrating tangles.
Addressing Skipped Stitches⁚ Causes and Remedies
Skipped stitches are a common sewing machine problem often linked to improper threading or thread tension. The thread guides play a critical role; if the thread isn’t correctly routed through each guide, it can cause the thread to snag or miss the needle’s eye, resulting in inconsistent stitching. Verify that the thread is correctly positioned within each guide, ensuring a smooth, unobstructed flow from spool to needle. Examine each guide for any damage or debris that might impede the thread’s progress. A bent or broken guide will necessitate replacement.
Incorrect tension settings are another frequent culprit. Too much tension can cause the thread to break or bunch, while too little can lead to skipped stitches. Adjust the tension dial, consulting your sewing machine’s manual for precise instructions. Also, check your needle for damage – bent or dull needles can’t properly grip the thread, leading to skips. Replace the needle with a fresh, sharp one appropriate for your fabric type. Finally, ensure your bobbin is correctly wound and inserted; an improperly wound bobbin can disrupt the stitch formation. By systematically addressing these potential issues, you can efficiently troubleshoot and eliminate skipped stitches, ensuring perfect seam consistency.

Optimizing Your Sewing Experience
Regular maintenance, including cleaning and oiling, keeps your machine running smoothly. Proper thread selection and tension adjustments are key for consistent stitching. Understanding your machine’s thread path, as guided by the thread guides, is essential for optimal performance.
Choosing the Right Thread for Your Fabric
Selecting the appropriate thread is paramount for achieving professional-looking seams and ensuring the longevity of your projects. The thread’s weight and fiber content should complement your fabric. For delicate fabrics like silk or chiffon, opt for fine threads (higher numbers like 60 or 80 weight) to avoid damaging the material. Conversely, heavier fabrics such as canvas or denim require thicker threads (lower numbers, such as 30 weight) for durability and strong stitches.
Consider the fabric’s fiber content. Natural fibers like cotton and linen typically pair well with cotton threads, while synthetic materials like polyester or nylon may benefit from polyester threads. Matching fiber types ensures a cohesive blend and prevents thread breakage or uneven stitching. Always check the thread weight recommendations on your sewing machine’s manual to prevent tension issues that could arise from using incompatible thread weights.
Experiment with different thread types to determine your preferences. Remember, the right thread choice not only enhances the aesthetic appeal of your work but also contributes significantly to the overall strength and durability of your finished product. Don’t hesitate to consult online resources or experienced sewers for guidance if you encounter any uncertainties in thread selection. The goal is to achieve a harmonious balance between thread and fabric, creating a perfect synergy for lasting results.
Maintaining Proper Thread Tension
Proper thread tension is the cornerstone of even, consistent stitching. Incorrect tension leads to puckering, skipped stitches, or broken threads, ruining your sewing projects. Your sewing machine usually has a tension dial; consult your manual for its location and adjustment range. Start with the recommended setting, typically around the middle of the dial. Test your tension on a scrap fabric before starting your project.
Observe your stitching. If the stitches are loose and uneven on the top, increase the tension. If the stitches are tight and bunch up on the underside, decrease the tension. Slight adjustments are often necessary depending on the fabric type and thread weight. Thicker fabrics or threads may require higher tension, while finer ones need less. Always test on a scrap of the same material you’ll be using for your project.
Remember that bobbin tension also plays a role. While the top tension is adjustable, the bobbin tension is usually factory-set. If adjusting the top tension doesn’t resolve the issues, consult your manual for bobbin tension adjustments or seek professional help. Maintaining the correct balance between top and bobbin tension is crucial for achieving flawlessly even and strong stitches. Regular checks and fine-tuning ensure consistently professional-looking results.
The Importance of Regular Machine Maintenance
Regular maintenance is paramount for ensuring your sewing machine operates smoothly and efficiently, extending its lifespan and preventing costly repairs. A well-maintained machine produces superior stitching, free from skipped stitches or thread breakage. Begin by consulting your machine’s manual for specific recommendations, as maintenance needs may vary depending on the model.
Clean your machine regularly. Use a soft brush or compressed air to remove dust and lint from the bobbin area, feed dogs, and other moving parts. Pay close attention to the thread guides, ensuring they’re clear of debris that could interfere with thread flow. Periodically lubricate moving parts with the recommended sewing machine oil, avoiding excessive application that could attract more dust and lint.
Inspect the needle regularly, replacing it at the first sign of bending or damage, which can cause skipped stitches or fabric damage. Check the tension discs for any damage or buildup, cleaning them gently as needed. Consider taking your machine for professional servicing annually or as needed to ensure thorough cleaning, lubrication, and adjustments. Preventative maintenance is far more cost-effective than emergency repairs.
Resources and Further Learning
To enhance your sewing machine threading skills and troubleshoot any persistent issues, numerous resources are available. Your sewing machine’s manual is an invaluable starting point, offering detailed diagrams and instructions specific to your model. Online video tutorials on platforms like YouTube provide visual demonstrations of the threading process, often showcasing different machine types and addressing common problems. These videos can be particularly helpful for visualizing the thread’s path through the guides and other components.
Many sewing blogs and websites offer comprehensive guides and articles on sewing machine maintenance and troubleshooting. These resources frequently include detailed explanations of thread tension, needle selection, and bobbin winding. Consider joining online sewing communities or forums, where you can interact with experienced sewers, ask questions, and share tips. Participating in these communities provides a supportive environment for learning and resolving any difficulties you encounter.
Finally, local sewing classes or workshops offer hands-on learning opportunities. These classes provide personalized guidance, allowing you to practice threading techniques under the supervision of an expert. By utilizing these resources, you can build your confidence and expertise in threading your sewing machine, ensuring smooth and enjoyable sewing experiences.